
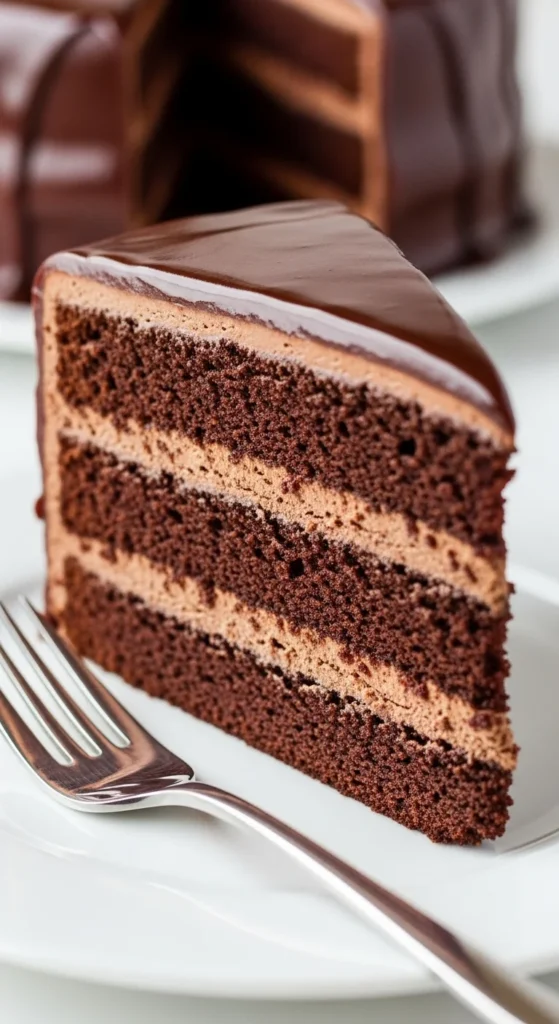
Ever wondered how professional bakers get that mirror-like shine on their chocolate cakes? The secret lies in perfectly made chocolate ganache — smooth, glossy, and irresistibly rich. Whether you want to drizzle it over cupcakes, glaze a layer cake, or dip strawberries, this easy method will make your ganache shine every time.
What Is Chocolate Ganache?
Ganache is a luxurious mixture of chocolate and cream that can be used as a glaze, filling, or frosting. Its shine comes from the right ratio of chocolate to cream and careful mixing.
Here’s the magic ratio:
- 1:1 (equal parts chocolate and cream) for a pourable, glossy glaze.
- 2:1 (more chocolate) for a thicker frosting or truffle filling.
When heated and mixed properly, the fat in the cream emulsifies with the cocoa butter in the chocolate, creating that silky-smooth texture and signature sheen.
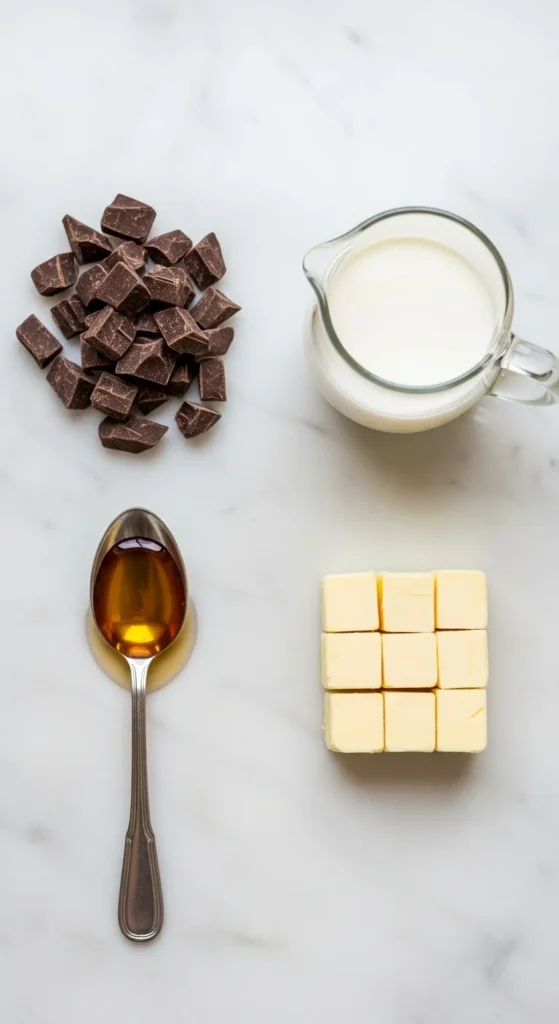
Step 1: Gather Your Ingredients
Before you start, make sure your ingredients are high-quality and at room temperature — this affects both taste and shine.
You’ll need:
- 8 oz (225 g) of semi-sweet or dark chocolate (finely chopped)
- 8 oz (225 ml) of heavy cream
- 1 tbsp unsalted butter (optional, for extra gloss)
- 1 tsp light corn syrup (optional, for shine and smoothness)
💡 Tip: Use good-quality chocolate bars instead of chocolate chips, which often contain stabilizers that can dull the finish.
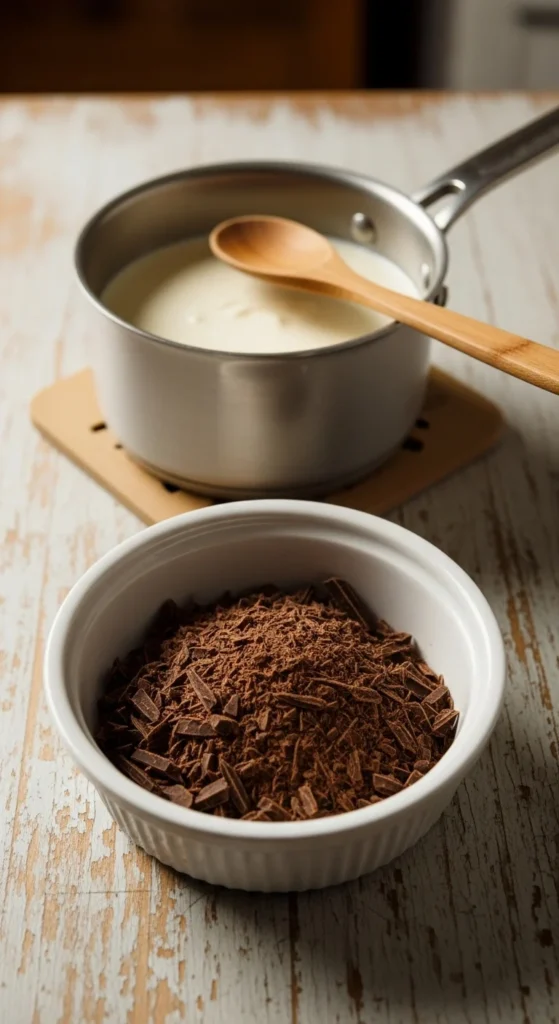
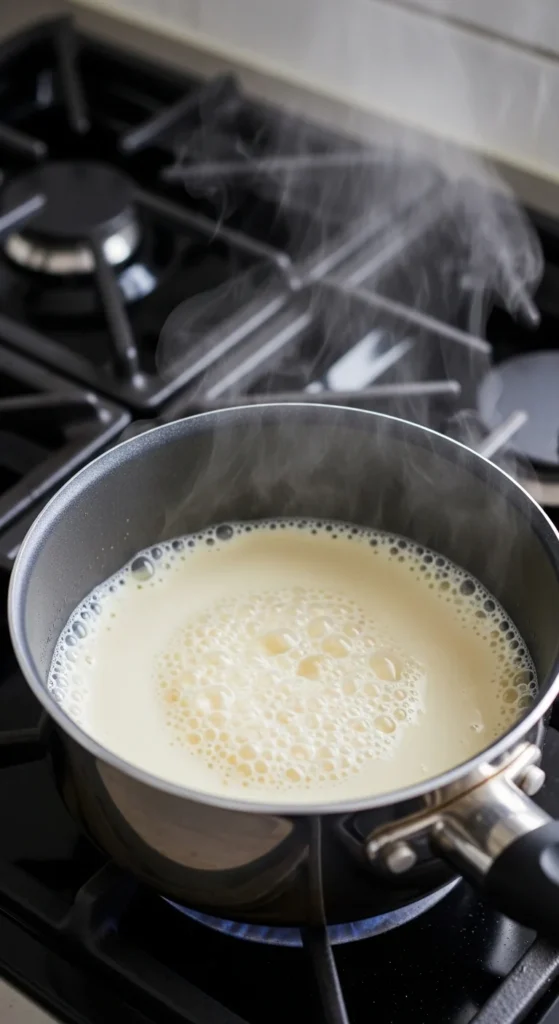
Step 2: Heat the Cream Gently
Pour the heavy cream into a small saucepan and heat it just until it begins to simmer. Do not let it boil — overheated cream can cause the ganache to separate.
When you see small bubbles forming around the edge of the pan, remove it from the heat immediately.
Step 3: Pour and Rest
Pour the hot cream over the chopped chocolate in a heatproof bowl. Let it sit undisturbed for 2–3 minutes to allow the chocolate to soften.
Resist the urge to stir right away — this short resting time helps the chocolate melt evenly, preventing grainy texture.
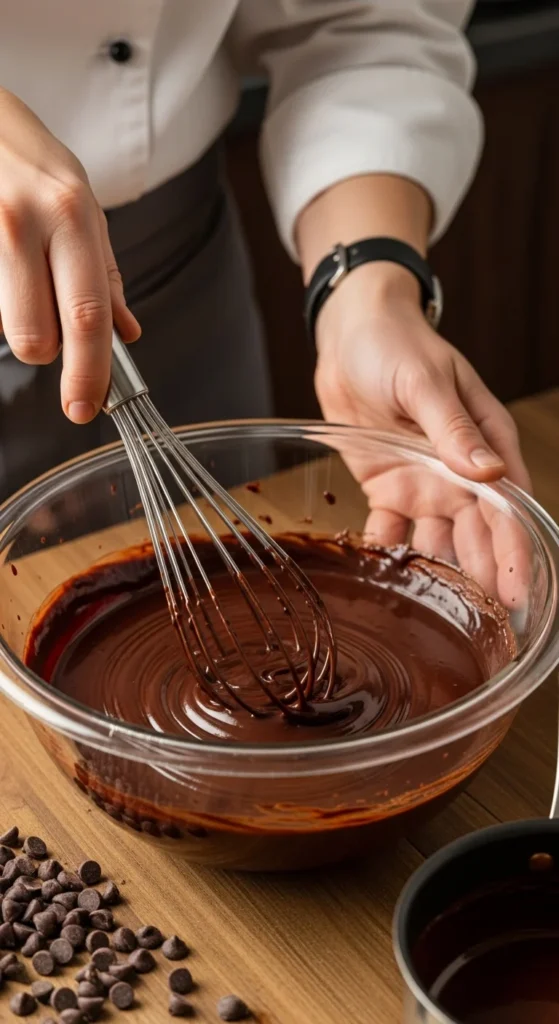
Step 4: Stir Slowly for Silkiness
Now, using a spatula or whisk, start stirring gently in small circles from the center outward. Continue until the mixture transforms into a smooth, glossy ganache.
If adding butter or corn syrup, stir them in at this stage for an extra touch of shine.
💡 Pro Tip: Avoid whipping too much air into your ganache. Stir slowly — you’re aiming for silky, not frothy.
Step 5: Adjust the Consistency
Depending on how you plan to use it, you can let your ganache cool or warm it slightly:
- For a glaze: Let it sit for 10–15 minutes until it thickens but is still pourable.
- For frosting: Chill for 30–40 minutes, then whip gently for a spreadable texture.
- For dipping: Keep it warm and fluid for easy coating.
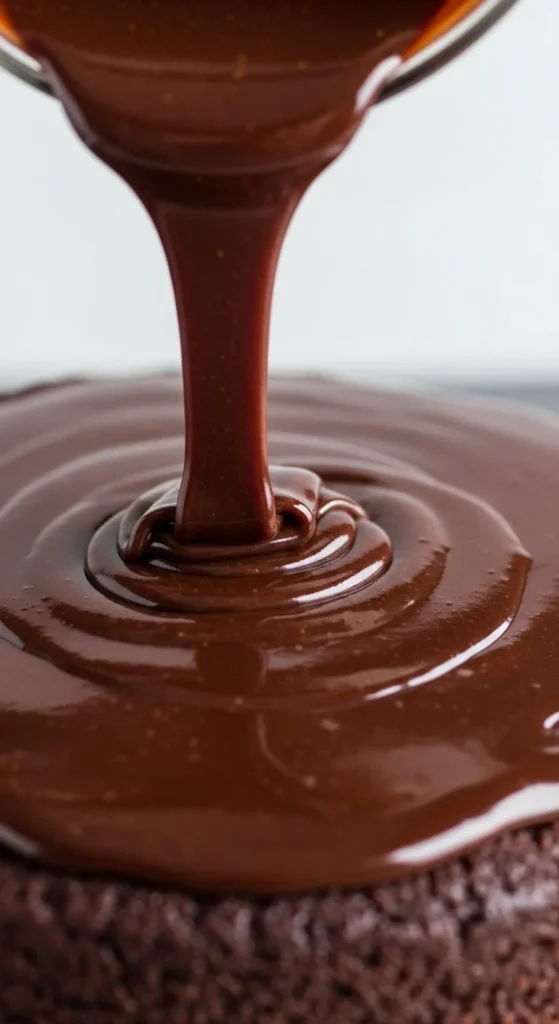
Step 6: Pour and Set for Shine
When your cake or dessert is ready, place it on a wire rack with parchment underneath. Pour the ganache slowly over the center and let it flow naturally down the sides. Don’t overwork it — the less you touch, the smoother the finish.

Let the ganache set at room temperature for about an hour. You’ll notice the surface turn glossy, firm, and mirror-like — the hallmark of perfect ganache!
Extra Tips for the Perfect Gloss
✨ Temperature matters: Cold cakes can cause ganache to set too quickly and lose shine. Always pour over a room-temperature cake.
🍫 Chocolate choice: Dark chocolate (60–70% cocoa) gives the deepest color and gloss.
🧈 Add-ins for perfection: A small amount of butter or glucose syrup enhances smoothness and adds a professional sheen.
🚫 Avoid refrigeration immediately: Cooling too fast can dull the shine. Let it set naturally first.
How to Store and Reuse
- At room temperature: Up to 2 days (covered).
- In the fridge: Up to 1 week. Reheat gently in a microwave or double boiler before using again.
Ganache also freezes beautifully for up to 3 months — just thaw overnight in the fridge and warm gently before using.
Final Touch
There you have it — your ultimate guide to making glossy chocolate ganache for cakes that looks straight out of a bakery window. Once you try this method, you’ll never settle for dull chocolate again!
Save this recipe for later and share it with your fellow chocolate lovers! 🍫

Leave a Reply