
Few things in life beat the smell of freshly baked chocolate chip cookies wafting through your kitchen. Warm, gooey, and golden brown — it’s the ultimate comfort treat. But if you’ve ever ended up with flat, dry, or burnt cookies, don’t worry. Mastering the perfect chocolate chip cookie isn’t rocket science — it’s just about knowing the right tips and techniques.
Step 1: Gather the Right Ingredients
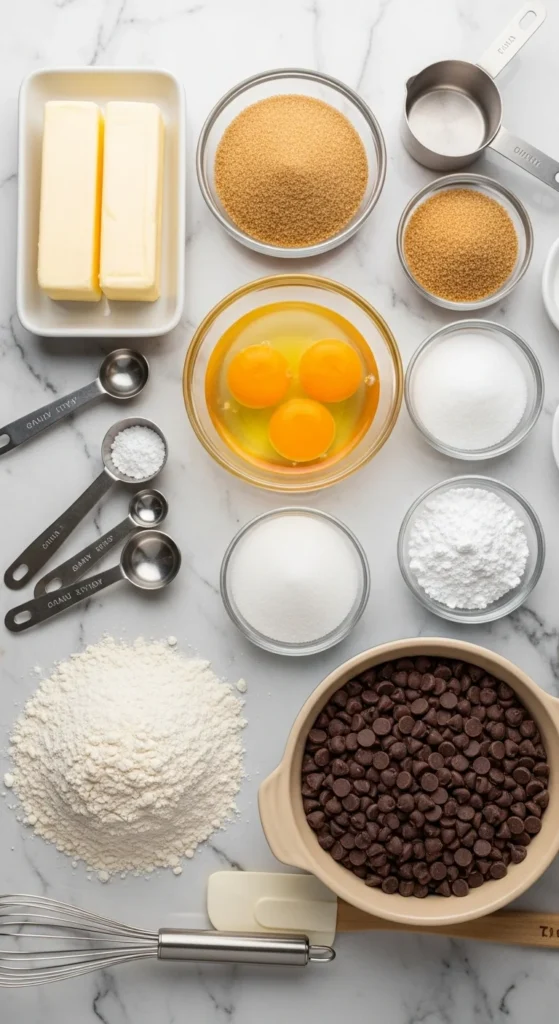
Great cookies start with great ingredients. Don’t underestimate the difference that quality butter or real vanilla extract can make!
You’ll need:
- 1 cup unsalted butter (softened)
- ¾ cup white sugar
- ¾ cup brown sugar
- 2 large eggs
- 2 tsp pure vanilla extract
- 2¼ cups all-purpose flour
- 1 tsp baking soda
- ½ tsp salt
- 2 cups semi-sweet chocolate chips
Pro tip: Use both white and brown sugar for the perfect texture — white sugar gives crisp edges, while brown sugar adds chewiness and moisture.
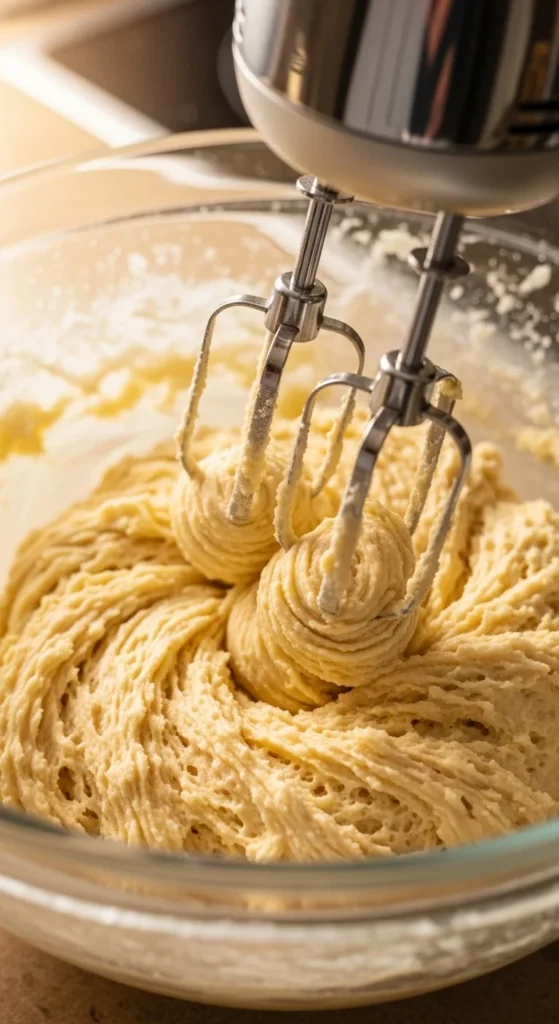
Step 2: Cream the Butter and Sugar
This step is the heart of cookie baking. Creaming means beating the butter and sugars together until they’re light, fluffy, and pale in color. This traps air, helping your cookies rise and bake evenly.
- Beat butter and sugars together for 2–3 minutes.
- Add eggs one at a time, mixing until just combined.
- Stir in vanilla extract for that warm, aromatic flavor.
Tip: Don’t overmix once you add the eggs — it can make cookies tough instead of tender.
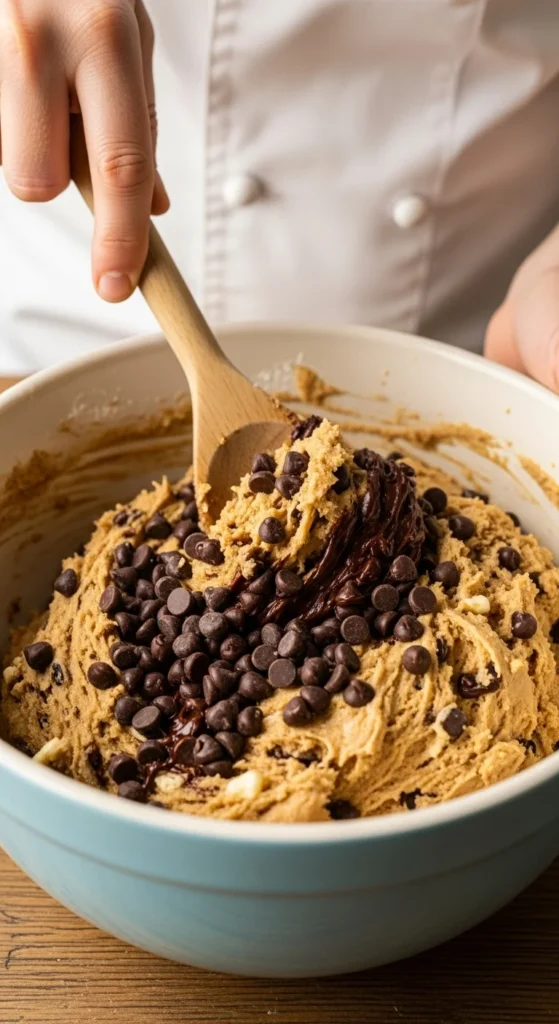
Step 3: Combine the Dry Ingredients
In a separate bowl, whisk together your flour, baking soda, and salt. This ensures even distribution before mixing them into the wet ingredients.
Slowly add the dry mix to the wet batter, stirring gently until just combined — you should still see a few streaks of flour when you stop mixing.
Then, fold in the chocolate chips with a spatula to prevent overworking the dough.
Optional upgrades:
- Add chopped walnuts or pecans for a nutty crunch.
- Sprinkle in sea salt flakes before baking for a gourmet twist.
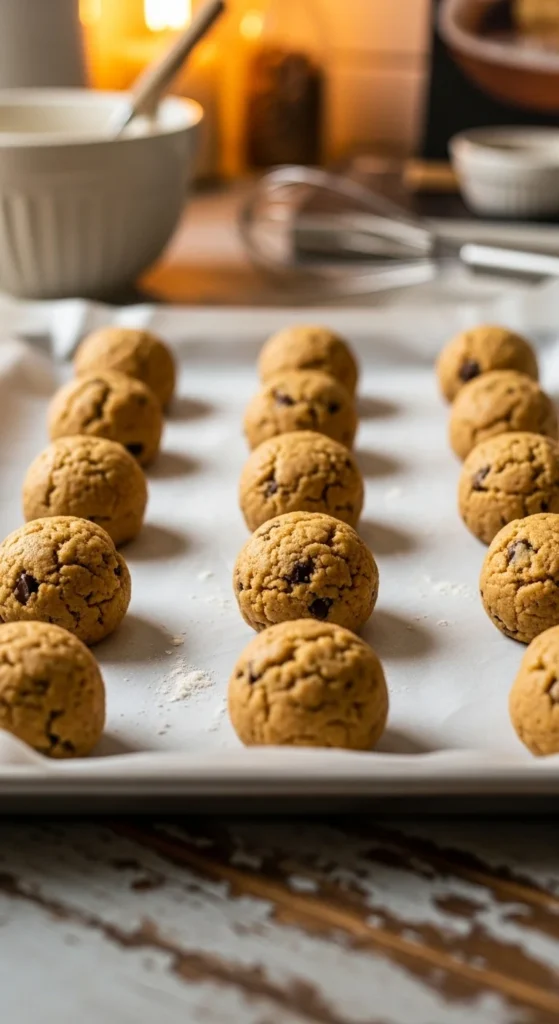
Step 4: Chill the Dough (The Secret Step!)
If you skip this, you’re missing out on perfect cookies. Chilling the dough for at least 30 minutes (or up to 24 hours) solidifies the butter, helping cookies spread less and bake evenly.
It also gives the flour time to hydrate and the flavors to deepen. The result? Thick, chewy cookies with a caramelized edge.
Pro tip: Scoop cookie dough balls before chilling — it’s much easier than scooping cold dough later!
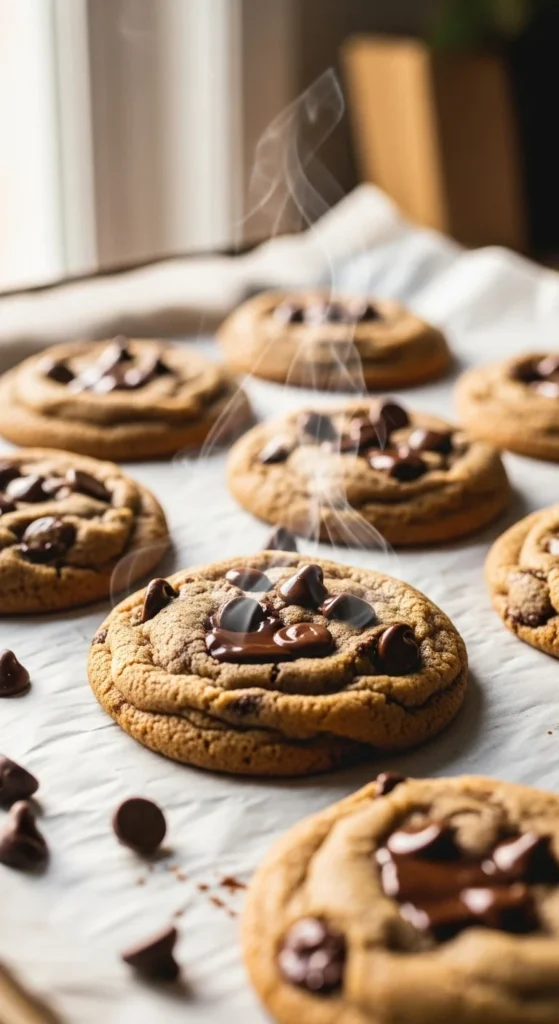
Step 5: Bake to Golden Perfection
Preheat your oven to 350°F (175°C) and line your baking sheet with parchment paper.
- Space dough balls about 2 inches apart.
- Bake for 10–12 minutes or until edges are golden and centers are slightly soft.
- Let cookies rest on the baking sheet for 2 minutes before transferring to a wire rack.
Pro tip: Cookies continue to bake slightly after you remove them from the oven — that’s how you get soft centers and crisp edges!
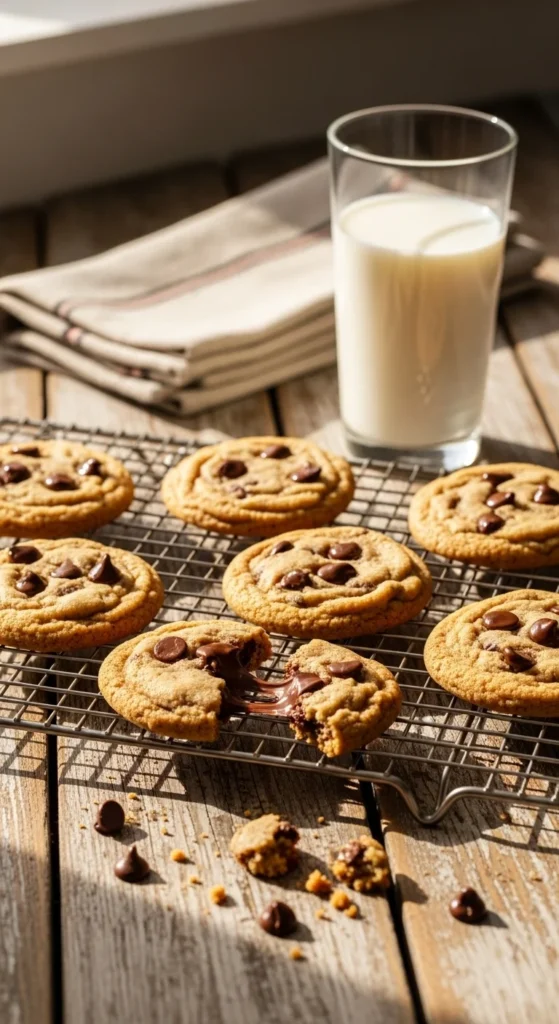
Step 6: Serve, Enjoy, and Store
Once cooled, pair your cookies with a tall glass of milk or scoop of vanilla ice cream for an irresistible treat.
To store:
- Keep in an airtight container at room temperature for up to 5 days.
- For warm cookies anytime, reheat in the microwave for 10–15 seconds.
Bonus tip: Freeze extra dough balls in a ziplock bag — bake them directly from frozen for instant cookie cravings!

Final Takeaway
Baking perfect chocolate chip cookies every time is all about balance — the right ingredients, careful mixing, and a little patience. Follow these simple steps, and you’ll have bakery-quality cookies that wow your family and friends.

Leave a Reply