
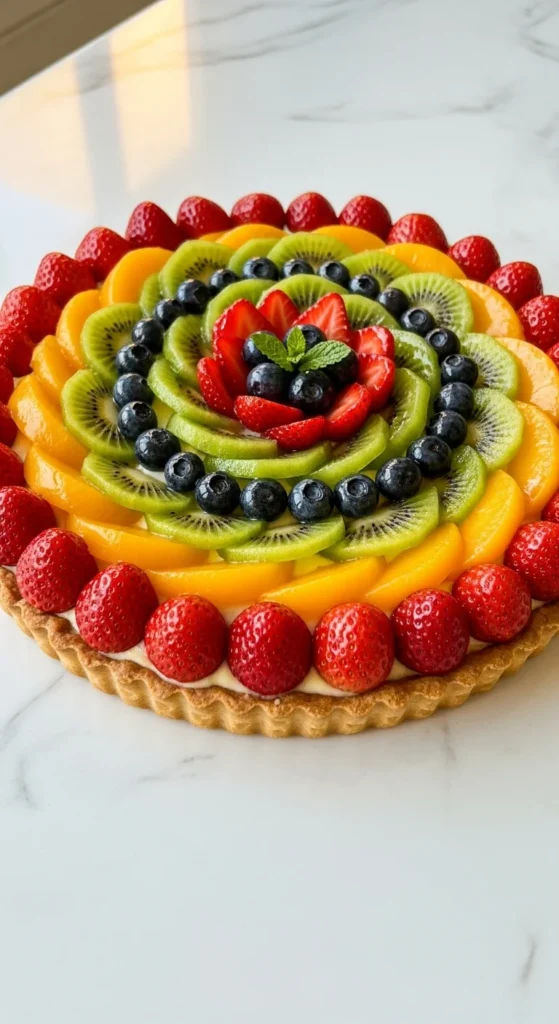
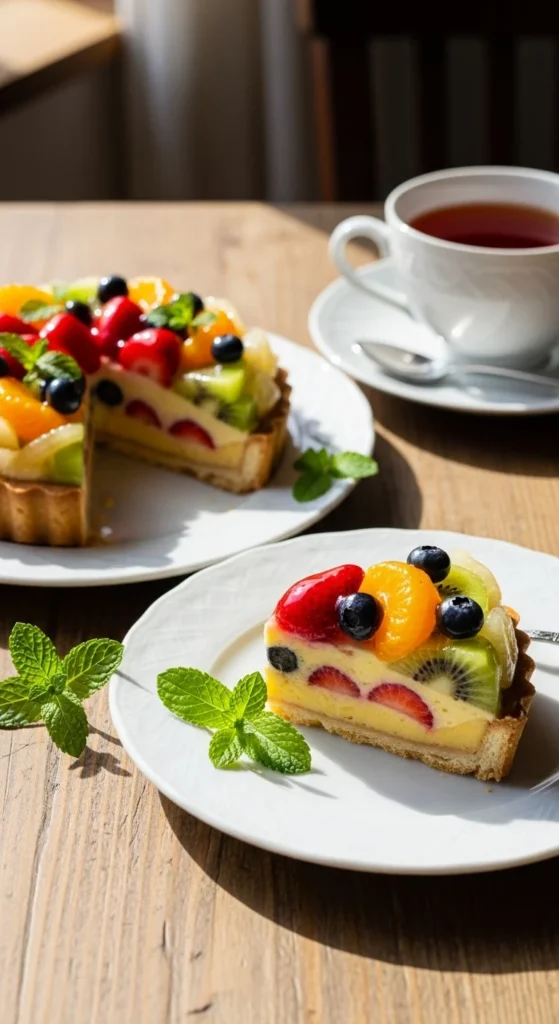
Nothing says “fresh and elegant” quite like a colorful fruit tart. With its buttery crust, creamy filling, and glossy fruit topping, this dessert is a showstopper for any occasion — brunches, birthdays, or even a cozy afternoon tea. The best part? You don’t need to be a professional baker to make one that looks straight out of a pastry shop!
In this guide, you’ll learn how to assemble a beautiful fresh fruit tart step by step — from the crisp crust to the final glossy finish that makes every fruit sparkle.
Step 1: Gather Your Ingredients
Before you begin assembling, make sure all the components are ready to go. A fresh fruit tart typically includes three parts: crust, filling, and fruit topping.
For the crust:
- 1 ¼ cups all-purpose flour
- ½ cup unsalted butter (cold, cubed)
- ¼ cup powdered sugar
- 1 egg yolk
- A pinch of salt
For the filling:
- 1 cup milk
- 3 egg yolks
- ¼ cup sugar
- 2 tablespoons cornstarch
- 1 teaspoon vanilla extract
- 1 tablespoon butter
For the topping:
- A mix of colorful fresh fruits (strawberries, kiwi, mango, blueberries, grapes, peaches, etc.)
- ¼ cup apricot jam (for the glaze)
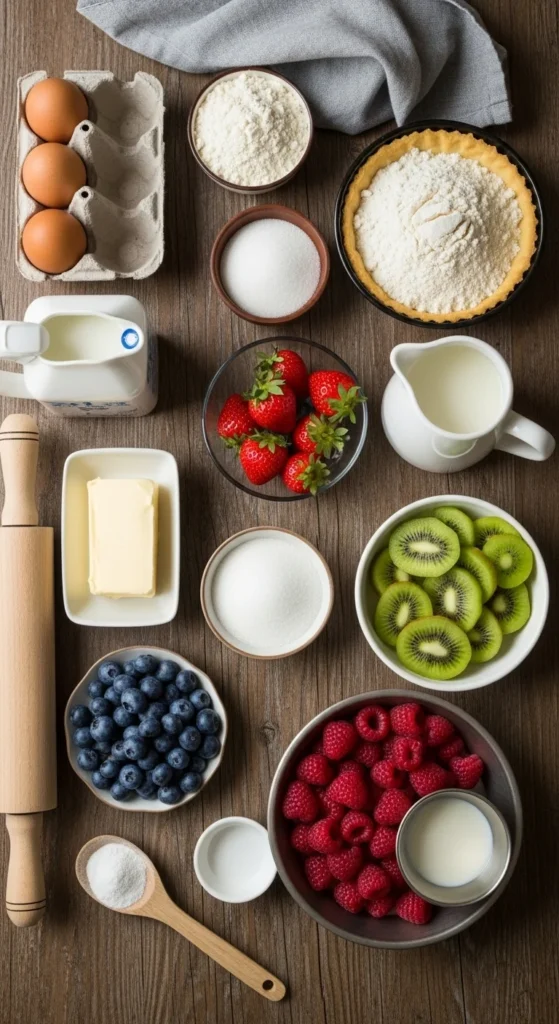
Pro Tip: Choose fruits that are ripe but firm, so they hold their shape beautifully once sliced and arranged.
Step 2: Bake the Tart Shell
A crisp, golden crust forms the base of your fruit tart — and it’s easier to make than you might think!
- In a bowl, mix flour, sugar, and salt.
- Cut in the cold butter until the mixture resembles coarse crumbs.
- Add the egg yolk and mix until the dough just comes together.
- Press the dough into a tart pan (with a removable bottom) and chill for 30 minutes.
- Prick the base with a fork and bake at 375°F (190°C) for about 20 minutes or until golden brown.
- Let it cool completely before adding the filling.

Pro Tip: Don’t skip the chilling step — it helps the crust stay firm and prevents shrinking while baking.
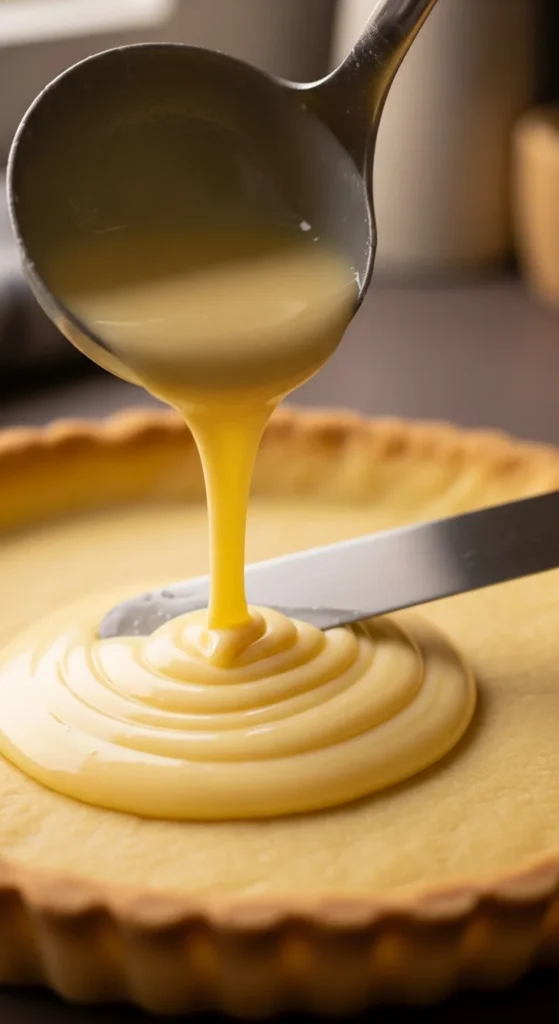
Step 3: Prepare the Creamy Filling
The custard filling is the heart of your tart — smooth, rich, and slightly sweet to balance the fruit’s natural tartness.
- Heat milk in a saucepan until just steaming.
- In a separate bowl, whisk together egg yolks, sugar, and cornstarch.
- Slowly pour the hot milk into the egg mixture while whisking.
- Return the mixture to the pan and cook over medium heat until thickened.
- Remove from heat, stir in butter and vanilla, and let it cool.
Once the custard has cooled to room temperature, spread it evenly over the cooled tart shell.
Step 4: Arrange the Fresh Fruits
Now for the most satisfying part — decorating! Think of your tart as a blank canvas.
- Start from the center and work outward in circles or layers.
- Use colorful combinations: strawberries with kiwi, blueberries with mango, or raspberries with peaches.
- Mix textures — juicy berries, soft bananas, crisp apples — for a more dynamic look.

Pro Tip: Symmetry and contrast make your tart visually striking. Alternate colors and shapes for that wow factor.
Step 5: Add the Glossy Glaze
To make your tart shine like it belongs in a bakery window, brush a light glaze over the fruit.
- Warm apricot jam in a small saucepan until melted.
- Strain to remove chunks and mix with a tablespoon of water.
- Gently brush the glaze over the fruit for a shiny, protective coat.
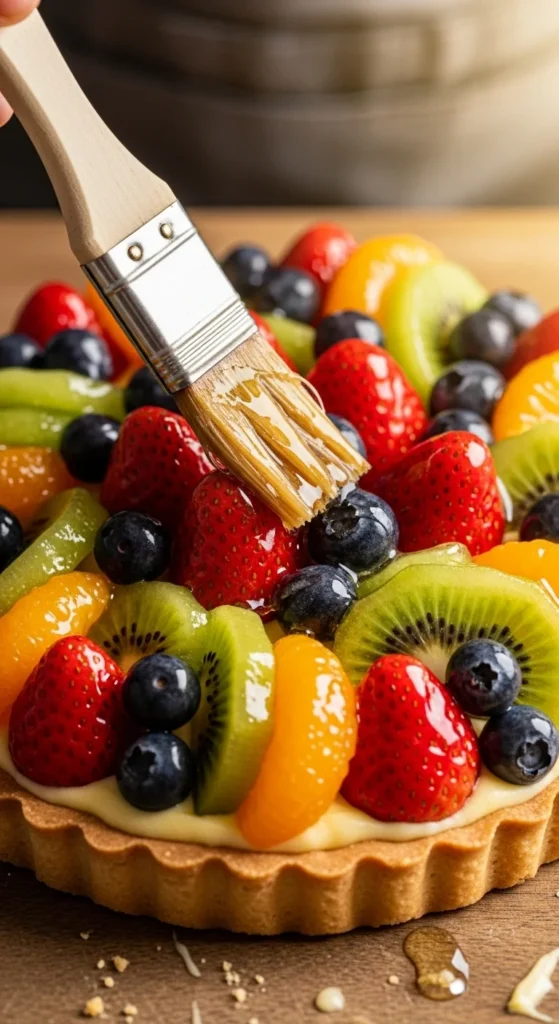
This step not only makes your tart look professional but also keeps the fruit fresh for longer.
Step 6: Chill and Serve
Refrigerate your assembled tart for at least an hour before serving. This allows the filling to firm up and the flavors to meld beautifully. When ready, slice with a sharp knife and serve chilled.
Serving Ideas:
- Dust with powdered sugar for a touch of elegance.
- Pair with a dollop of whipped cream or a drizzle of honey.
- Serve alongside tea or sparkling lemonade for a refreshing finish.
Final Touch: Make It Yours
Now that you’ve mastered the basics, get creative! Try these fun twists:
- Use chocolate custard or mascarpone instead of vanilla cream.
- Experiment with seasonal fruits like figs or pomegranate.
- Add edible flowers for a touch of sophistication.
Takeaway
There’s something incredibly rewarding about assembling your own fresh fruit tart — it’s not just baking; it’s art. With every colorful slice, you’ll taste the perfect harmony of buttery crust, creamy filling, and juicy fruit.
So go ahead, save this recipe for later and impress your guests (or yourself) with a dessert that looks as stunning as it tastes! 🍓🥝

Leave a Reply